


Authentication is the process of verifying the identity of users. We don't want to allow unauthorized users to access our private resources.
In this blog, we will use a JWT token-based mechanism for authentication.
Setting up a basic Express application
Create a directory and install the required packages:
 mkdir jwt-auth
 cd jwt-auth
 npm init -y // initialize package manger
 npm i express dotenv nodemon
npm init -y: this command creates a newpackage.jsonfile with default settings.express: it will help us to build an express app.dotenv: It helps to load.envfile variables.nodemon: it will restart our server when we make a change.
2. Create a .env file to store private keys.
//.env
  PORT=3000
  TOKEN_SECRET=3434k34jk34j3k4
Create a server.js file.
 // server.js
 const express = require("express");
 const app = express();
 const dotenv = require("dotenv");
 dotenv.config();

 const port = process.env.PORT || 3000;

 // Define a basic route
 app.get("/", (req, res) => {
   res.send("Hello world!");
 });

 // Start the server
 app.listen(port, () => {
   console.log(`Server is running on port ${port}`);
 });
Open the
package.jsonfile and set up the nodemon to run our server.{ //... "scripts": { "start": "nodemon server.js" }, //... }
Our basic server is ready. We can start it with this command: npm run start
Implementing User Registration and Login
Now that we have set up our basic server, let's implement user registration and login functionalities.
Registration:
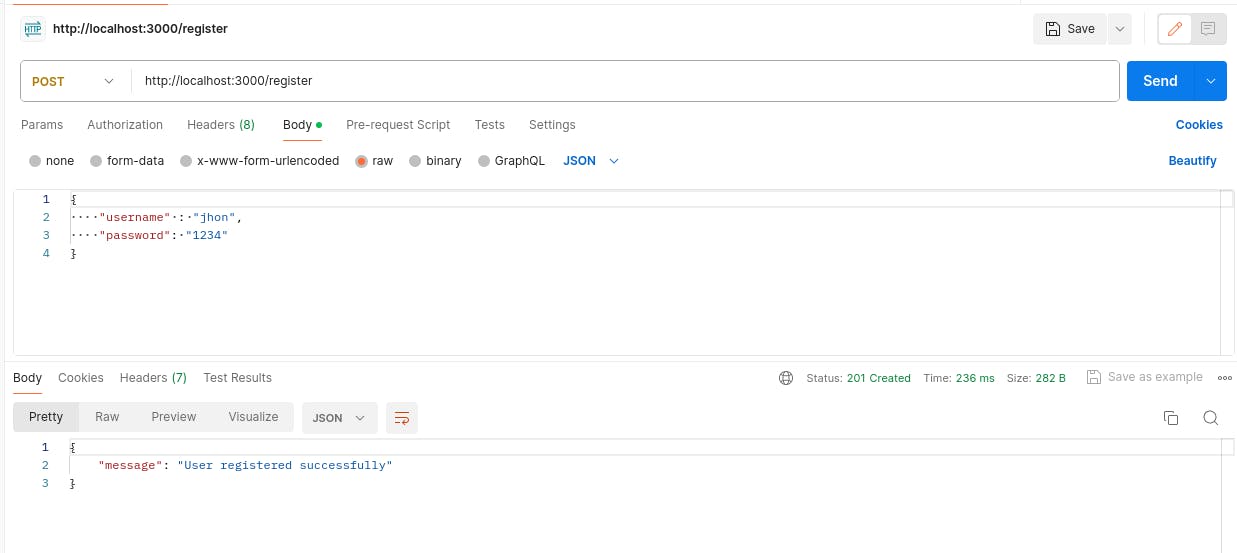
 // server.js
 //...
 // In real world apps we use database to store data, but here we
 // will be using users array for simplicity.
 const users = [];

 app.post("/register", async (req, res) => {
   try {
     const { username, password } = req.body;

     // encrypt user password
     const hashedPassword = await bcrypt.hash(password, 10);

     //save user
     users.push({ username, password: hashedPassword });

     res.status(201).
         json({ message: "User registered successfully" });
   } catch (error) {
     res.status(500).json({ error: "Registration failed" });
   }
 });
 //...
We make a post request to our server using Postman with username and password fields.
Login:
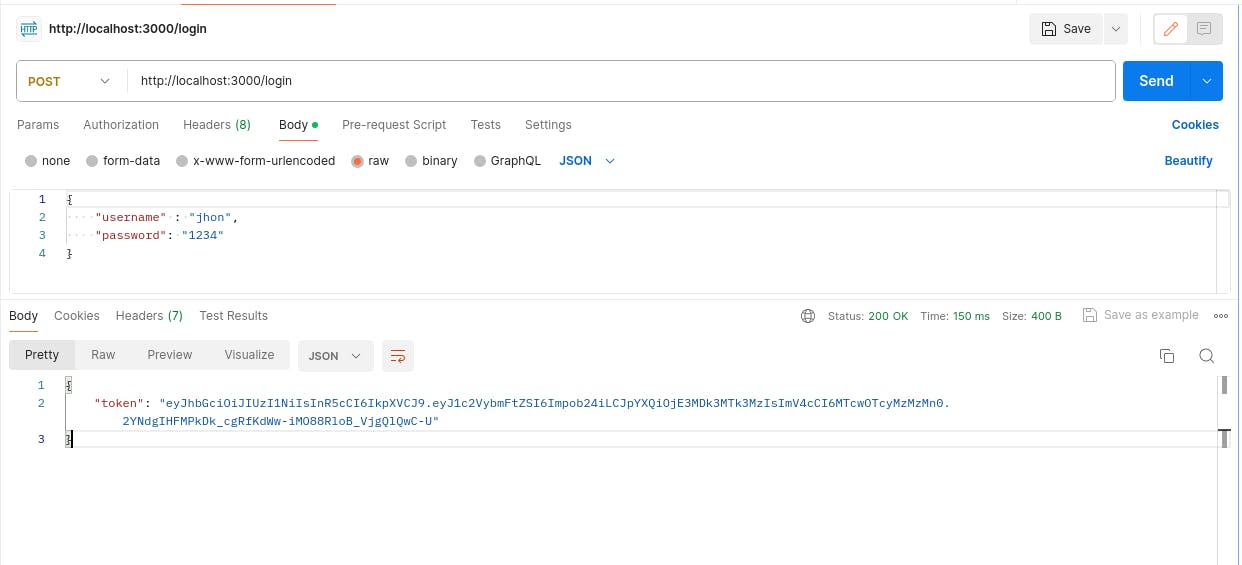
 //server.js
 //....
 app.post("/login", async (req, res) => {
   try {
     const { username, password } = req.body;
     //check if user exists
     const user = users.find((user) => user.username === username);
     if (!user) {
       return res.status(401).json({ error: "Invalid username" });
     }
     //check if password are correct
     const validPassword =
             await bcrypt.compare(password, user.password);

     // wrong password
     if (!validPassword) {
       return res.status(401)
         .json({ error: "Invalid username or password" });
     }

     // correct password, generate token and send user the token
     const token = generateToken(username);
     res.json({ token });
   } catch (error) {
     res.status(500).json({ error: "Login failed" });
   }
 });
 // generate access token
 function generateToken(username) {
   return jwt.sign(
                  { username },
                  process.env.TOKEN_SECRET,
                  { expiresIn: "1h" }
             );
 }
 //...
To get a token, we log in with the user credentials.
We have implemented user registration and login functionalities with JWT tokens.
JWT token structure
Let's understand the structure of a JWT token.
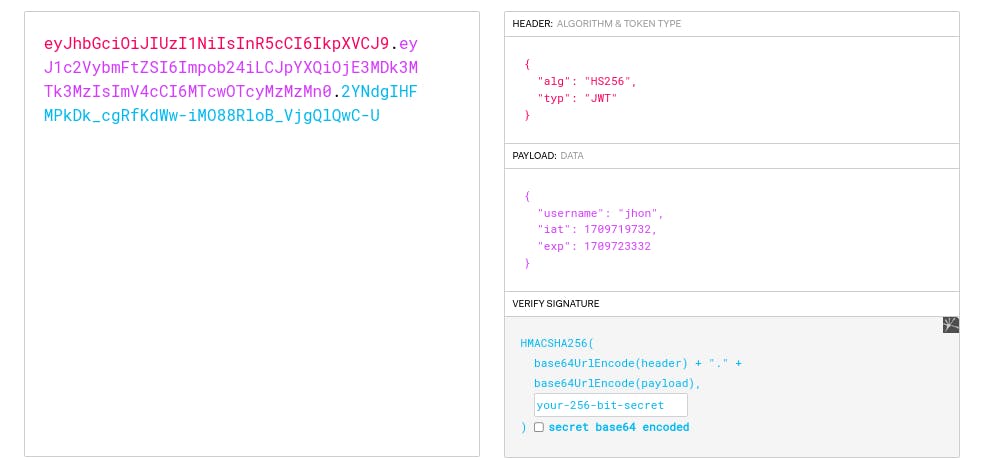
A JWT token consists of three parts:
Header: It contains information about the token itself.
Payload: It contains user information like user_id, or user name, token expiry time, and when the token was issued.
Type Signature: This part ensures the token hasn't been tempered.
We can decode the token on the jwt.io website to see the internal structure.
You need to paste the token on the website and you will get details about each part.
This is the structure of the token that we generated:
Middleware for token verification
We will create a middleware function to verify the token. A middleware function takes three parameters: req, res and next.
Create a new file called authMiddleware.js and then implement a function called verifyToken.
// authMiddleware.js
const jwt = require('jsonwebtoken');

function verifyToken(req, res, next) {
    // get bearer token from req headers.
    // the token string starts with 'Bearer cde3h434h3j...'
    // so we remove the first word - Bearer and access the token.
    const token = req.headers.authorization.split(" ")[1];

    if (!token) {
            return res.status(401)
            .json({ error: 'Unauthorized: No token provided' });
    }

    jwt.verify(token, 'secretkey', (err, decoded) => {
        if (err) {
            return res.status(401)
            .json({ error: 'Unauthorized: Invalid token' });
        }
        console.log(decoded);
       // the decoded is a object with following properties
      //{ username: 'jhon', iat: 1709719732, exp: 1709723332 }
      // iat : issued at
      // exp: expire time

        // add user to req object.
        req.user = decoded.username;

        next();
    });
}

module.exports = verifyToken;
Securing routes with authentication
Let's use verifyToken middleware function to protect a private route.
Import the verifyToken middleware function in the server.js file.
//server.js
//....
const verifyToken = require("./authMiddleware");
//...

// secure route
// this route is only accessible to the users who has a vlid token
app.get("/private-route", verifyToken, (req, res) => {
  try {
      // if you reach here, it means you have a valid token
     // You can access private data
      res.json({ message: `${req.user} has accessed private route!` });
    } catch (error) {
        res.status(500).json({ error: 'Internal server error' });
    }
});
//....
When a user accesses the /private-route, the veryfyToken middleware executes before the route handler function. And if the user has a valid token, then only the route handler function executes.
Conclusion
First, we installed a few packages and then, set up a basic express server.
Then we set up register and login routes.
We used the bcrypt package to encrypt the user password.
In the login route, we generated a JWT token with a username as payload.We signed the token with our
JWT_SECRETkey.We implemented a
verifyTokenmiddleware function that protects our private routes.
I hope you found this blog useful. Thanks.