

Making applications communicate with a database is a common requirement in modern web development. MySQL is a popular database that is used with Node.js.
In this blog, We will see how to connect a Node.js application to a MySQL database and perform CRUD (Create, Read, Update, Delete) operations.
We will use the mysql2 package to connect to the database and execute queries. And for creating a web server, we will use the Express framework.
Let's get started!
Setting Up the Project
To get started, ensure that you have installed Node.js and MySQL on your system.
First, create a project folder and change the current directory to the project folder and run the following commands in the terminal:
npm init -y
npm install express mysql2
The npm init -y command will generate a package.json file that stores project meta-data. And npm install express mysql2 command will install the express framework and mysql2 driver module that will help us connect the app to the MySQL server.
Connecting to the MySQL database
Create a new file named config_DB.js and import the mysql2 module in it.
// config_DB.js

const mysql = require("mysql2");

// Database connection details
const connection = mysql.createConnection({
  host: 'localhost',
  user: 'root',
  password: 'your_password',
  database: 'database_name, will create in next section',
});

// Connect to the database
connection.connect((err) => {
  if (err) throw err;
  console.log("Connected to MySQL database.");
});

// Close the database connection when the application exits
process.on("exit", () => {
  connection.end((err) => {
    if (err){
       console.error("Error closing the MySQL connection:", err.message);
    }else{
        console.log("MySQL connection closed.");
    }
  });
});

module.exports = { connection };
Creating a database and a table
Before performing CRUD operations, we need to create a database and a table where we will store our data.
There are two ways to create a database and a table:
MySQL command line interface(CLI): It's a command line tool.
MySQL Workbench client: It's a GUI(graphical user interface) software.
I am going to use MySQL command line(CLI) in this blog. The CLI tool allows us to interact with the MySQL server with commands.
Create a database:
We can create a new database using the CREATE DATABASE <database_name> command. Replace the <databse_name> with your desired name.
CREATE DATABASE <database name>;
Example:
/* create student_info database */
CREATE DATABASE student_info;
Use the created database
After creating the database, we need to switch to it using the USE statement. This step is essential as all the CRUD operations will be performed in the selected database.
Example:
USE student_info;
Create a table:
Once we select a database, we can create a table using the CREATE TABLE statement. Define the table name and its columns along with their data type and constraints.
CREATE TABLE table_name (
  column1 datatype constraint,
  column2 datatype constraint,
  ...
);
Example:
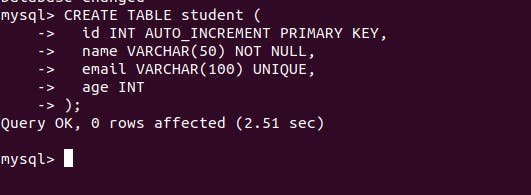
CREATE TABLE student (
  id INT AUTO_INCREMENT PRIMARY KEY,
  name VARCHAR(50) NOT NULL,
  email VARCHAR(100) UNIQUE,
  age INT
);
This command creates a table name student in our student_info database. The student table has four columns: id, name, email, and age where the id will increment automatically as we insert data into the table.
Each column has some constraints. The name column can't be NULL and the email column can't contain duplicate emails.
Now we know how to create databases and tables. Let's execute those commands in the MySQL CLI.
- First, open a terminal and type the following command to start the MySQL CLI:
sudo mysql -u root -p

Then type,
type CREATE DATABASE student_info;to create the database:
Now, select the created database by
USE student_info;statement:

Now, create the student table in the selected database.
At this point, we have created a database (student_info) and a table(student) inside the database. We haven't inserted any data yet.
We can verify the created database and the table by running the following commands: SHOW DATABASES; and SHOW TABLES;

Set up the express web server
Create a new file named app.js (or any name). In this file, import the express module and configure an express web server.
//app.js
const express = require("express");

//create an instance of express
const app = express();
const port = 3000;


// Here, we will implement routes for CRUD in the following sections


// Start the server
app.listen(port, () => {
  console.log(`Server is running on port: ${port}`);
});
Now, Import the connection object from the configDB.js file to the app.js.
//app.js
const express = require("express");

// <<<<<<<<<<< import connection object <<<<<<<<<<<<<<<<<
const { connection } = require("./db_config.js");

//create an instance of express
const app = express();
const port = 3000;


// Here, we will implement routes for CRUD operations
// in the following sections


// Start the server
app.listen(port, () => {
  console.log(`Server is running on port: ${port}`);
});
Perform CRUD Operations
Create (INSERT) data in the database
Let's fill the student table with some student records. I am using Postman software to perform GET, POST, DELETE, and UPDATE requests. The Postman is a tool that is used to test APIs.
The following route makes a query to the database to store the incoming student data in the request body.
// app.js
//.....

app.post('/student', (req, res) => {
  const newStudent = {
    name: req.body.name,
    email: req.body.email,
    age: req.body.age,
  };

  connection.query('INSERT INTO student SET ?', newStudent, (err, results) => {
    if (err) {
      console.error('Error creating student:', err.message);
      res.status(500).send('Error creating student.');
    } else {
      res.status(201).json({ id: results.insertId, ...newStudent });
    }
  });
});
From the Postman, we make post requests to create student records in the database.
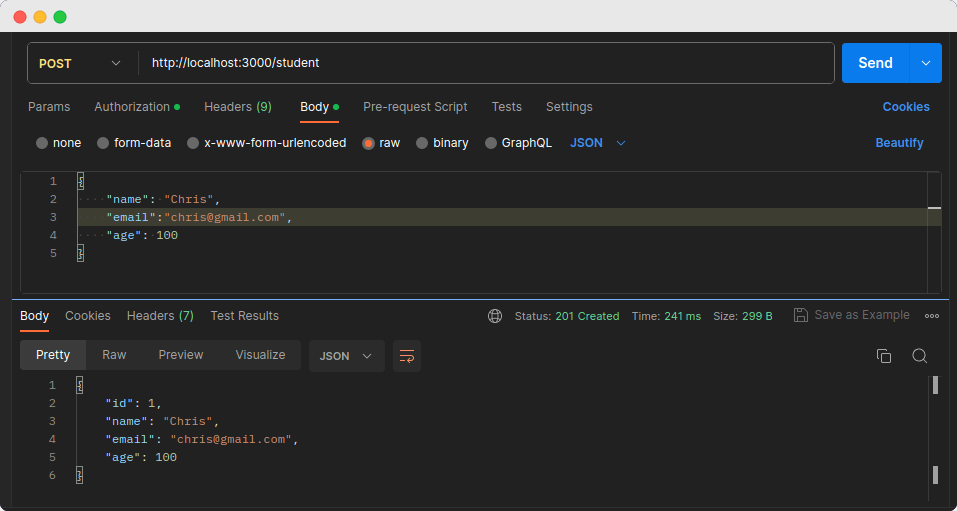
In this picture, We are making a POST request to create a student record in our database. In the request body, I am sending a student's name, email, and age in JSON format. We don't need to pass the id property manually, MySQL automatically creates it for us as it was auto increment.
When we make a post request, in the response we get the created student records.
I have created three student records by making a post request. In the next route, we will retrieve them from the database.
Read data from the database:
In the previous step, we created a few student records in the database. Let's fetch those records from the database.
//app.js
app.get('/student', (req, res) => {
  connection.query('SELECT * FROM student', (err, results) => {
    if (err) {
      console.error('Error retrieving students:', err.message);
      res.status(500).send('Error retrieving students.');
    } else {
      res.status(200).json(results);
    }
  });
});
This route trigger a query SELECT * FROM student to retrieve all students' records from the database.
In the below image, we can see the stored students in the database.

Update data
We have three students in our database with IDs 1, 2, and 3.
Let's update the age of the student with id 1.
// app.js

app.put("/student/:id", (req, res) => {
  const studentId = req.params.id;

  const updatedStudent = {
    name: req.body.name,
    email: req.body.email,
    age: req.body.age,
  };

  connection.query(
    "UPDATE student SET ? WHERE id = ?",
    [updatedStudent, studentId],
    (err, results) => {
      if (err) {
        console.error("Error updating student:", err.message);
        res.status(500).send("Error updating student.");
      } else {
        res.status(200).json({ id: studentId, ...updatedStudent });
      }
    }
  );
});
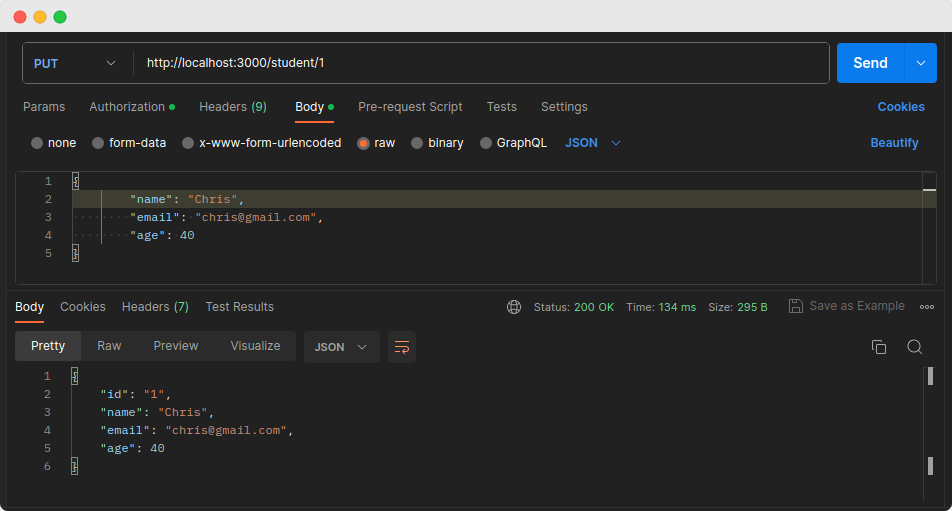
We made a PUT request to update the student with id 1. In the body of the request, we set the age of the student to 40. In the response, we get an updated student record. We can see in response that the student's age has been updated from 100 to 40.
Delete data
Let's delete the student with id 1.
//app.js

app.delete("/student/:id", (req, res) => {
  const userId = req.params.id;

  connection.query(
    "DELETE FROM student WHERE id = ?",
    userId,
    (err, results) => {
      if (err) {
        console.error("Error deleting student:", err.message);
        res.status(500).send("Error deleting student.");
      } else {
        res.status(200).send("Student deleted successfully.");
      }
    }
  );
});
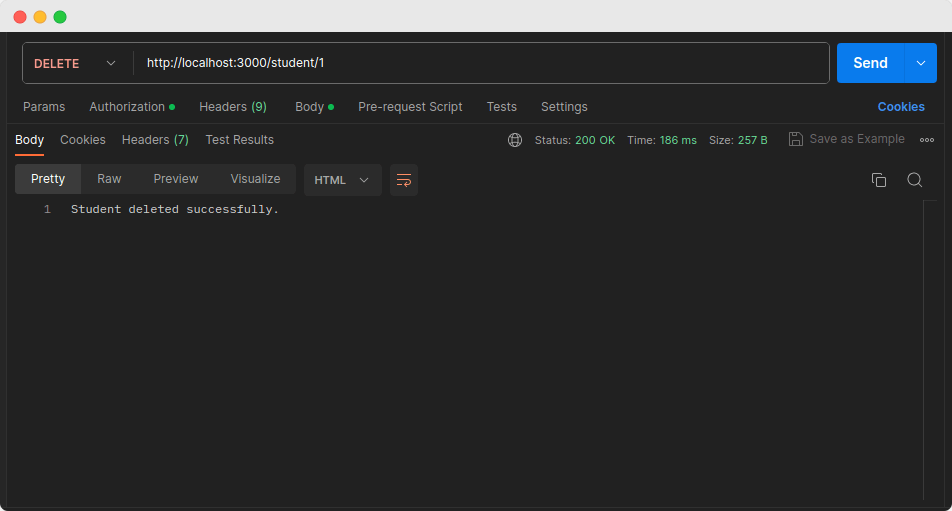
When we make a DELETE request to delete the student with id 1, in the response, we get a message " Student deleted successfully".
If we make a GET request now, we will find that student with id 1 has been removed from the database.
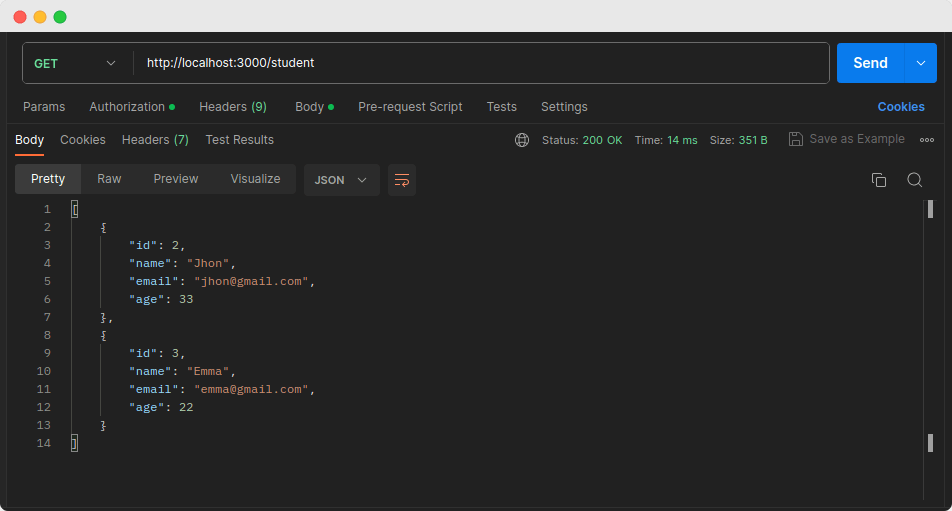
In this image, we can see that student with id 1 has been deleted from the database.
Conclusion
In this blog post, we learned how to connect a Node.js Express application to a MySQL database and perform CRUD operations.
We used the mysql2 module to establish the connection and execute the SQL queries.